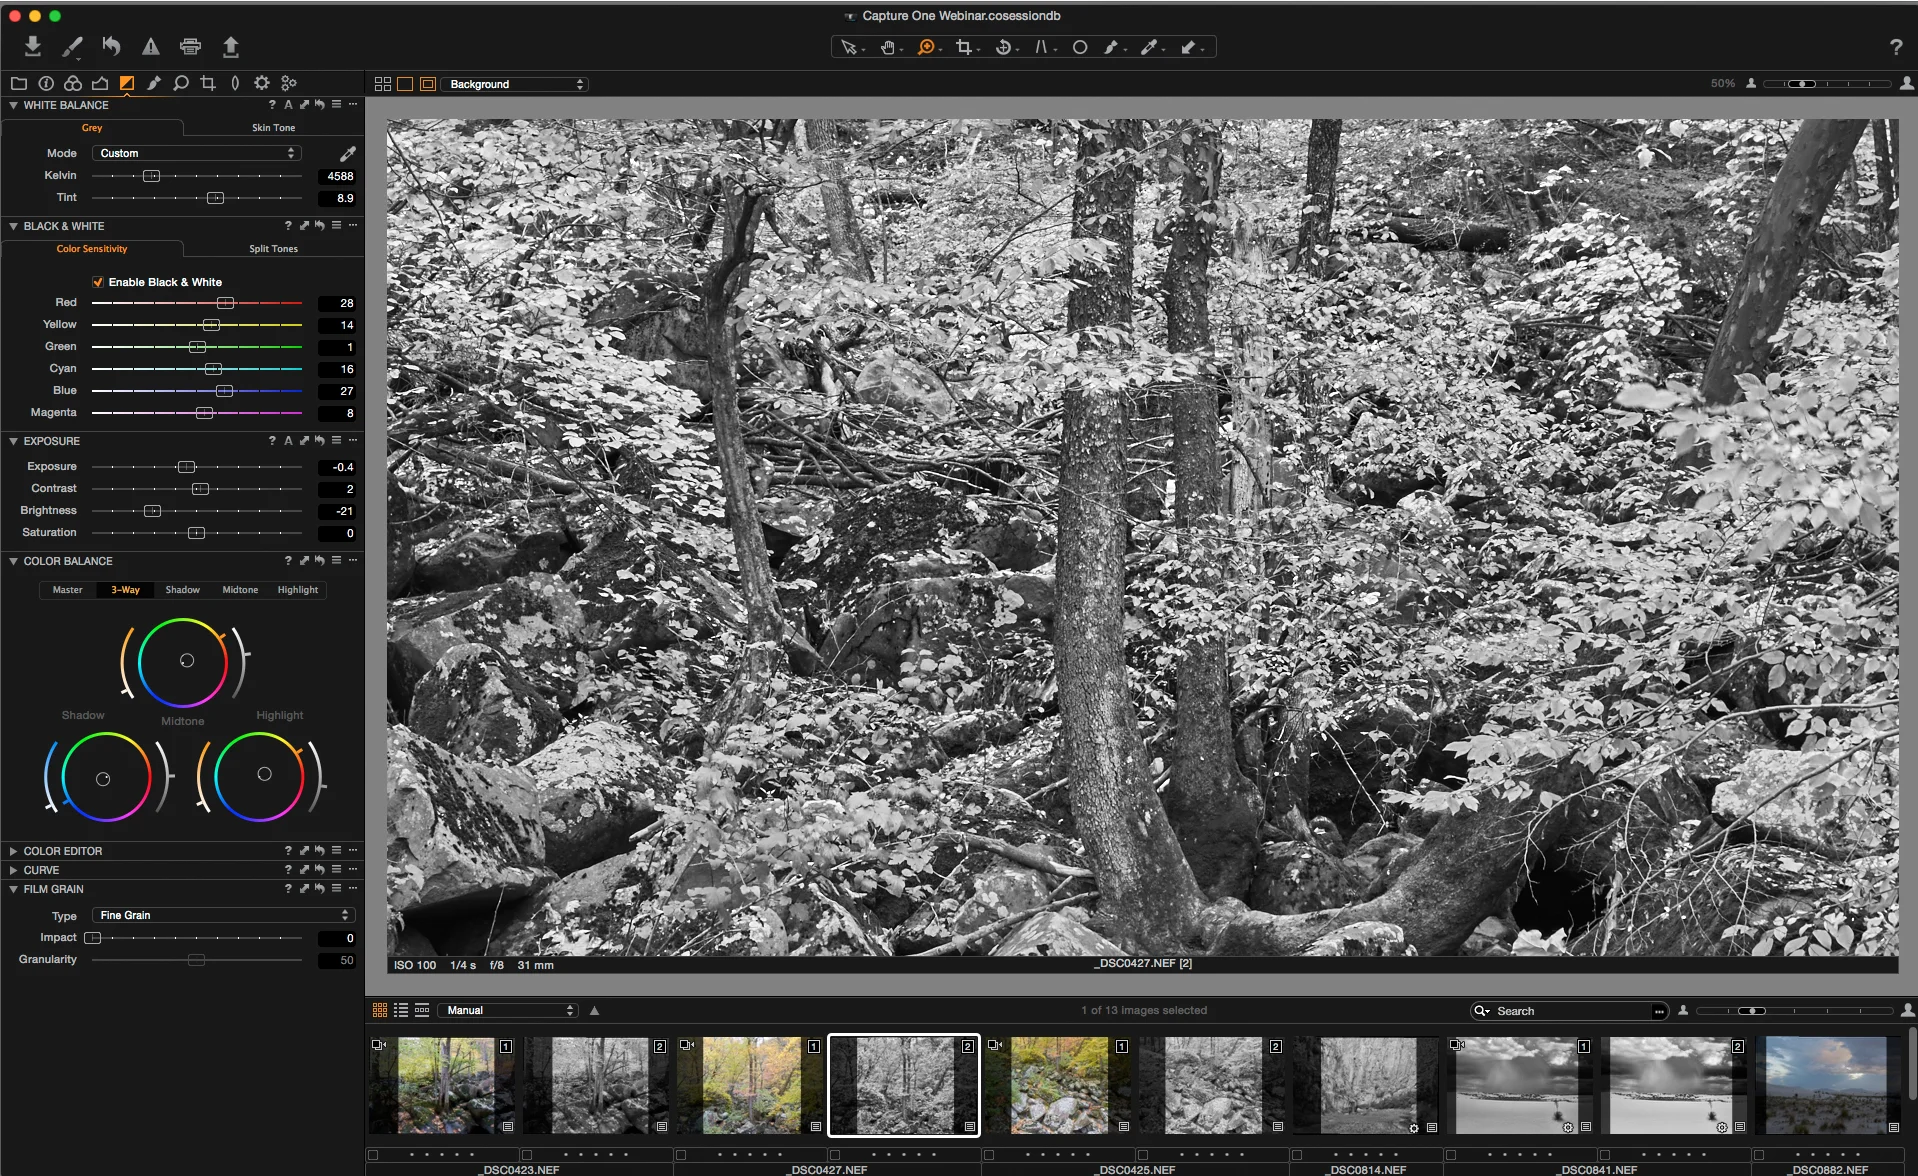
Setting up custom workspaces for effortless black and white editing with Capture One Pro
Workflows
Get good at one or two and ignore the rest.
I was thinking a lot about the different Black and White workflows, and digital editing workflows as a whole after the Photoshop Elements post I made yesterday. I think there is a case that it is better to choose one or two methods and get really good with them and then ignore all the rest, no matter how much better or easier people claim the new thing might be. I have as hard a time as anyone with that—I am testing and writing a review of the new release of Capture1 Pro 8 (changing the name might be an improvement too). The point is the more time spent learning different software and workflows the less time/energy/bandwidth there is to focus on the work. It is up the the user to define what their intention for the work is and balance tools/software/workflows with image quality requirements and personal preferences.
I find that making local tonal edits in Photoshop is easier, more intuitive, and more definable than using the control points and gradients in Lightroom or Capture 1 (and SEP too I imagine). In photoshop the curves/masks are easy to re-edit, use with blending modes, and then fine tune with layer and mask opacities. One thing I couldn't live without is the ability to turn the visibility of the adjustment layer on and off the and enable/disable the mask quickly see the before and after of each individual adjustment with/without the mask.
With my Digital workflow, I tend to always be moving forward and rarely do I need to go back and re-edit the raw file, so I never use smart object or do all my edits in Lightroom or capture 1. In a way it is based a more analogue style workflow: Develop the film, make proofs, and then do my dodging and burning when making the print. Each step has a specific goal and method.
My digital workflow is as follows:
- I do a quick RAW adjustement (usually of single files I've already decided on) in either Lightroom, Camera Raw, or Capture 1 (it is usually Capture 1 for my personal work). If the picture could benefit from large gradient adjustments or general local contrast adjustments I do that in one of two layers in Capture 1, or just export a lighter/darker virtual copies from Lightroom .
- Then I export those "developed" files as full size RGB 16-bit tiffs.
- I do my black and white conversion in either Silver Efex or Photoshop (with the black and white adjustment layer, or multiple B&W adjustment layers if it benefits from a blend of different color filtration settings)
- Once the conversion is made I convert to a 16-bit greyscale and then do my dodging and burning in photoshop with curves adjustment layers and masks.
Drum Scan, Invert and Correct in Photoshop, Optimize for Print or Web
Working from film scans it is much the same:
- Develop the film
- Do a quick batch scan on a flatbed to make proofs (similar to an import to Capture 1 or Lightroom).
- Select the few I want and drum scan only those negatives (similar to the develop mode in the digital workflow).
- Do the inverting and contrast adjustment, and then all the burning and dodging in Photoshop.
- Then either output a digital negative to make platinum/palladium prints or make a direct inkjet print.
But like I said, so much of it is just experience and familiarity of the interface of the tools available to you. I try to get people to see past the immediate intimidation of Photoshop and start to work with a few powerful yet easy to use features. When some things are tried to be made "easier" like auto levels, or preset develop modes in Lighroom or Silver Efex it can often do more harm to the image than learning how to use the small number of tools that will give you the best results.


