
During a recent private Photoshop lesson with a student, we were attempting to address a problem with what what me be seen as “flare” around highlight areas that bleed into the mid-tones, giving it a mushy or muddy feeling. I introduced him to a type of detail enhancement that is often used for color images, but that I've adapted for increasing the detail of flatbed scans of prints being used in two differnt book projects I’m currently working on.
I am using the same image from the previous post comparing Capture 1 Pro 8 and Adobe Camera Raw to illustrate these steps. Fine details, like those in this picture, run the risk of quickly degrading if not carefully sharpened and masked, and the techniques shown here can be used to temper the sharpening or fine detail enhancements without blowing out detail, which can happen with other sharpening methods.
As a bonus I am making this photograph available as a part of a special discounted print offer on images used to illustrate select posts on this site. Read more about this offer at the end of this post or click here now.
You can see the problem in this first screen shot. The areas around the highlights look like they are flared so we can deal with that, and at the same time, increase some of the fine detail separation through out the who image.
PART 1 - Reduce Halos and Increase Subtle Mid-tone Separation
The following series of steps are illustrated in the gallery of screenshots below.
- If you are working from digital capture you can just duplicate the background layer two times, and name the top most copy “detail” and the lower copy “reduce halo”.
- Turn off the visibility of the “detail” layer and make “reduce halo” the active layer
Select Unsharp Mask from the Filter>Sharpen menu.
- Use an Amount of about 20-30, a Radius of 30, and a Threshold of 0 and then apply the filter.
- It will look over sharpened all over, but we are going to use a blend mode layer mask to selectively darken the lighter midtowns.
- Change the blend mode of the reduce halo layer to Darken. This alone will improve the image, but might make the shadow tones a little too dark.
- To localize the "reduce halo" layer to the upper mid-tones create a new layer mask, and fill with black by alt/option clicking the layer mask icon in the layers panel.
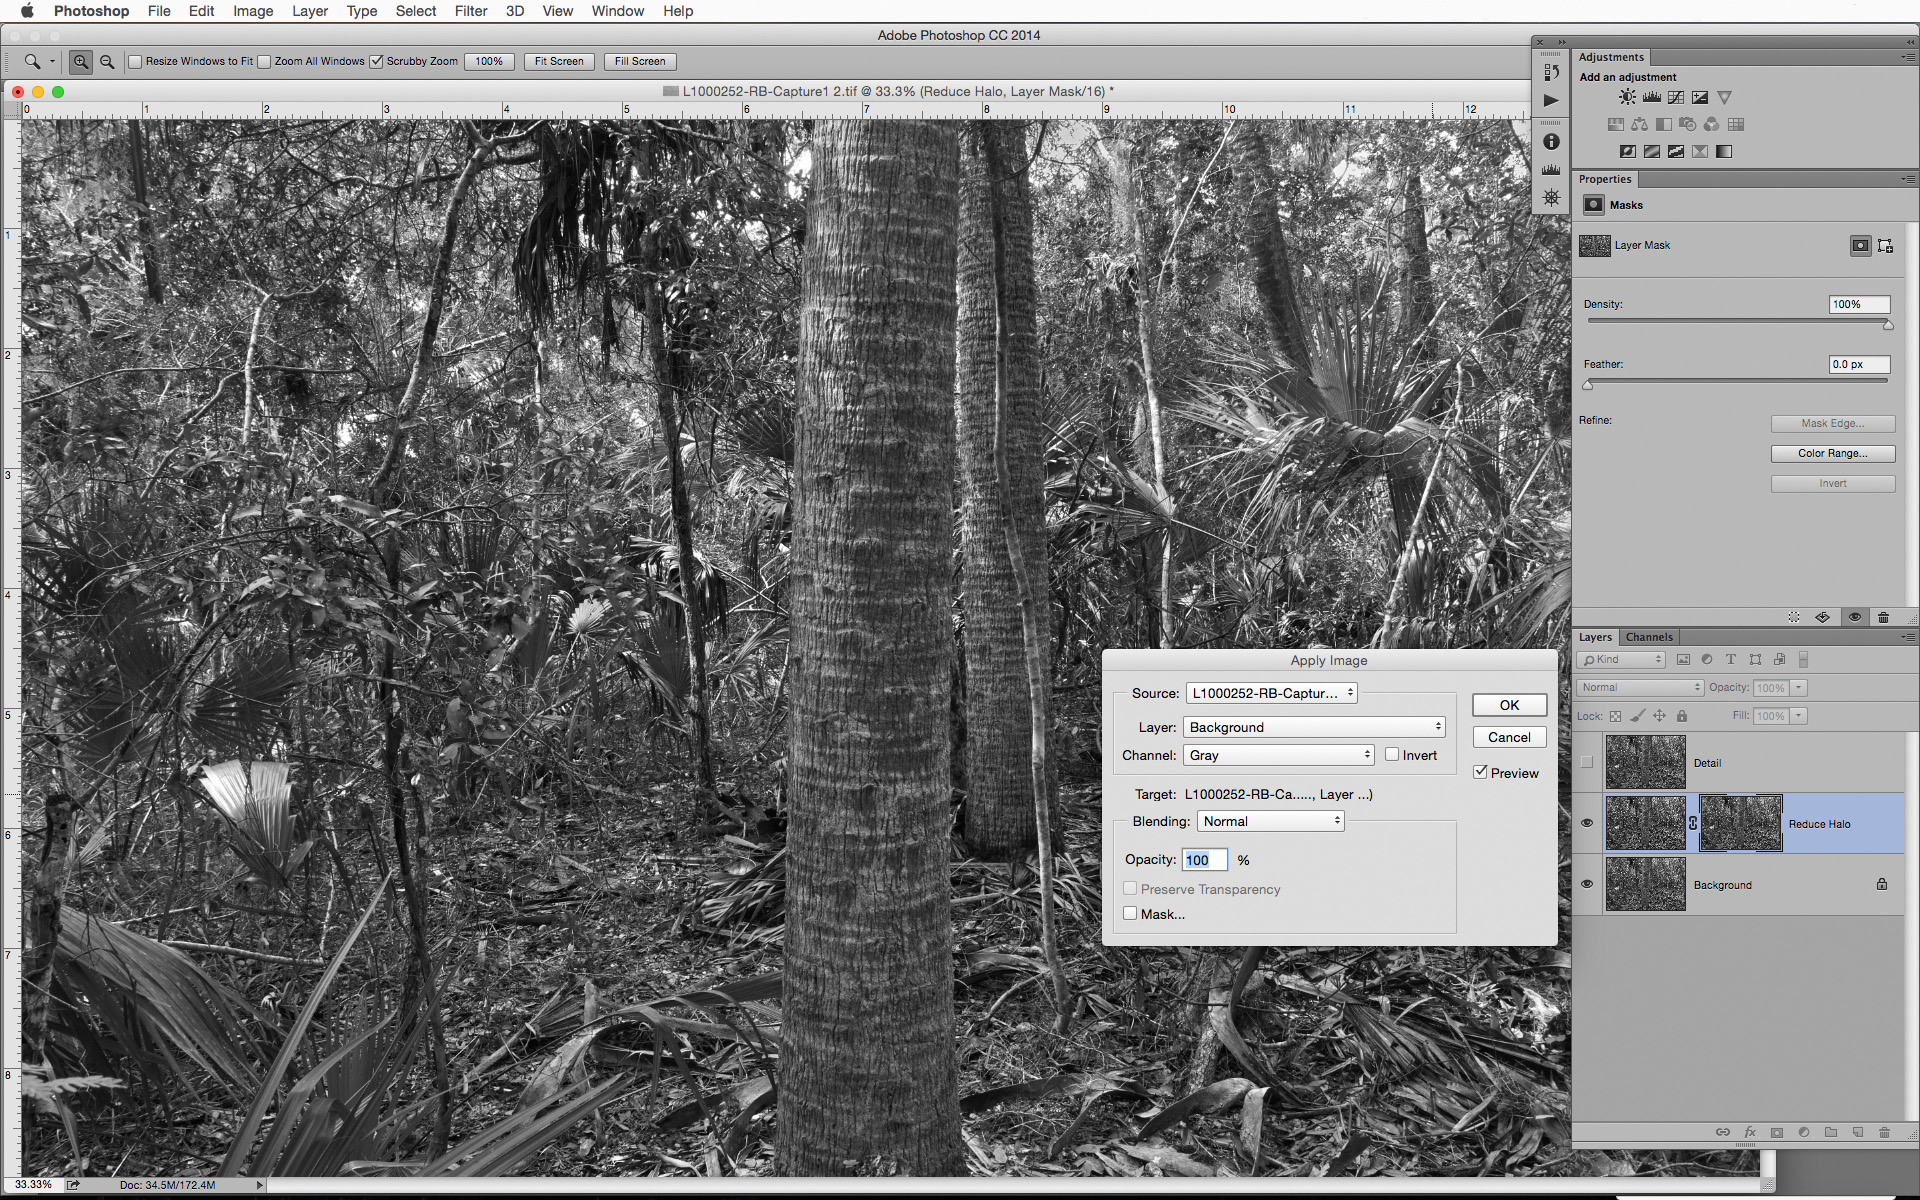
With the layer mask active, navigate to Apply Image in the Image menu.
Select background as the source and set the blend mode to Normal, and then click OK to accept. This will create a luminosity mask and make the "reduce halo" effect proportional to the tones in the image.
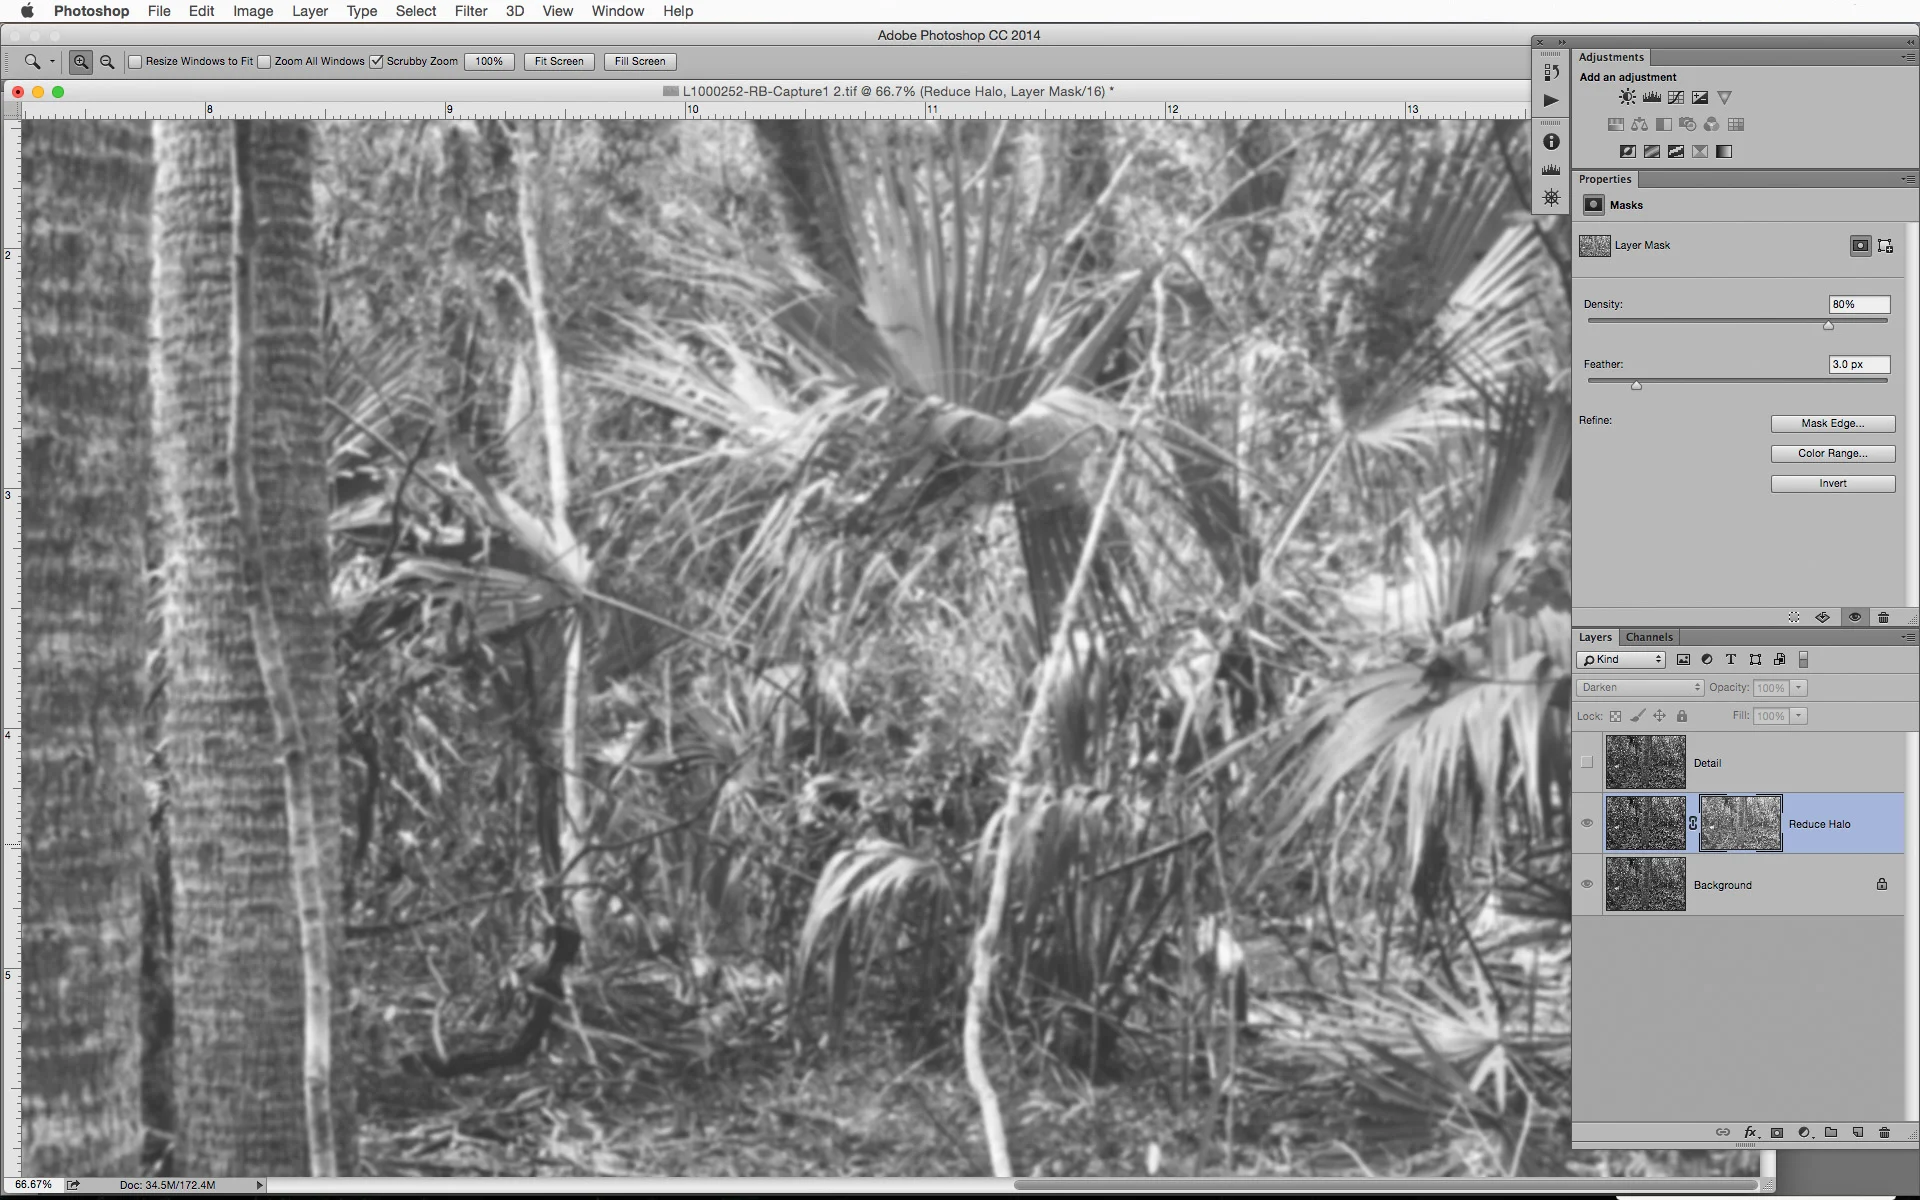
This effect can be further controlled in the Masks Panel by setting the feathering to a value between 2-5 pixels.
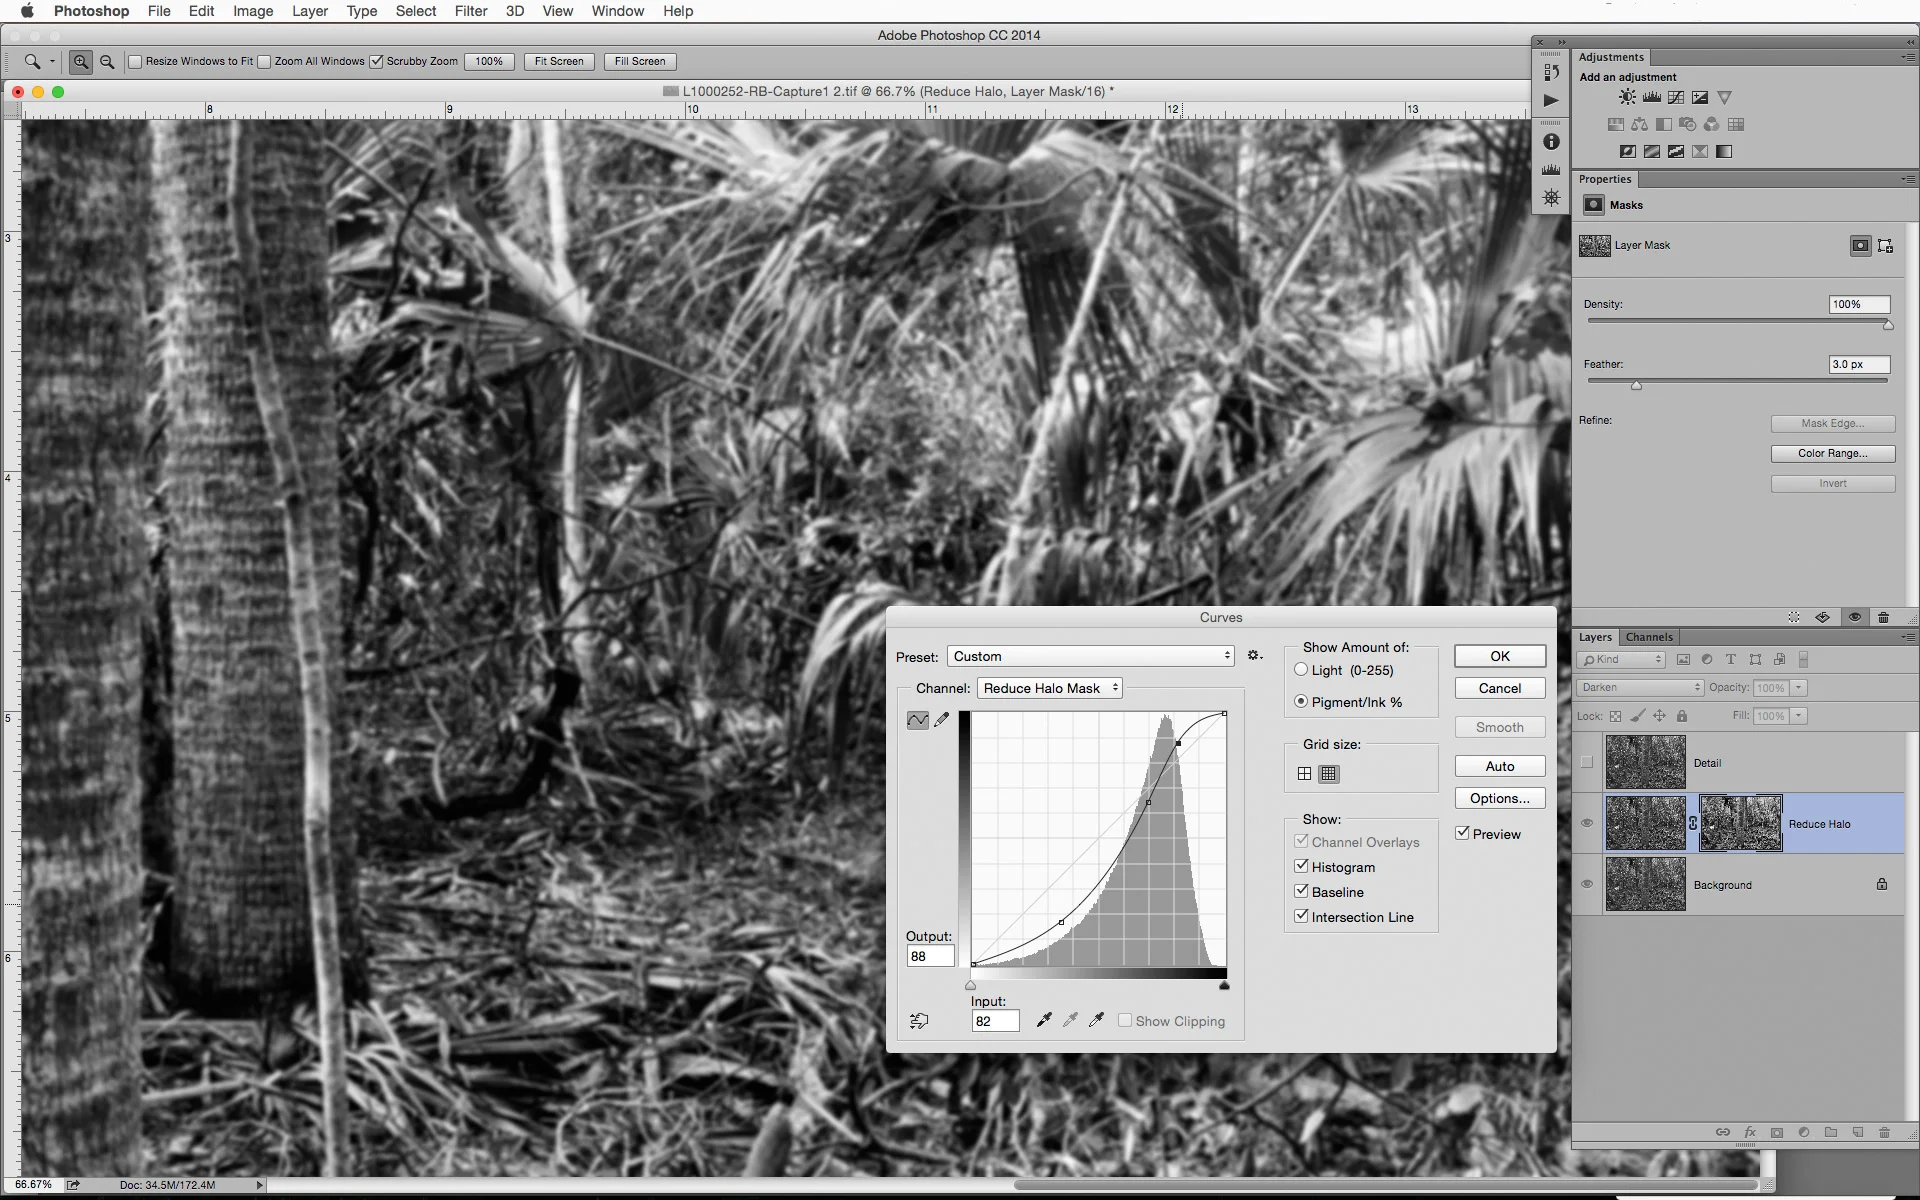
The range of tones affected can be controlled by applying a curves adjustment to the mask.
To do this, make the mask active and press option/alt while clicking in the mask icon, and then hit cmnd/cntrl+m to bring up the curves adjustment, and darken the shadow portion of the curve and lighten the highlights. It is important to note that once the curve is applied, it cannot be readjusted.
You can lower the density and readjust the feathering of the mask in the Masks Panel or lower the opacity of the layer to achieve the desired effect.


After making these adjustments to the mask, the original sharpening effect becomes very subtle, but helps enhance the mid-tone contrast so you are not increasing the appearance of any halos when making other lightening adjustments later in the editing process.
Part 2 - Enhance Mid-tone Detail
This short workflow and following series of steps is very similar to the "reduce halo" steps, but targets a different range of tones and uses slightly different settings. The screenshots at the end illustrate the different settings and what you masks and results should look like
Make the “Detail” layer active, and select unsharp mask from the Filer>Sharpen menu.
- The Amount and Radius should both have a value around 30. Threshold should be 0.
- The highlights will be very over sharpened, but like in the previous workflow, it will be controlled with a luminosity mask.
- Create a new opaque layer mask (fill with black) by alt/option while clicking the Create Layer Mask Icon in the Layers Panel.
With the layer mask active, navigate to Apply Image in the Image menu.
- Select Background as the Source, set the Blend Mode to Normal, check the Invert box, and click OK. This will create a luminosity mask resulting in the sharpening effect being inversely proportional to the tone in the image.
- This can be controlled in the Masks Panel like any other mask by feathering the mask with a setting between 2-5 pixels.
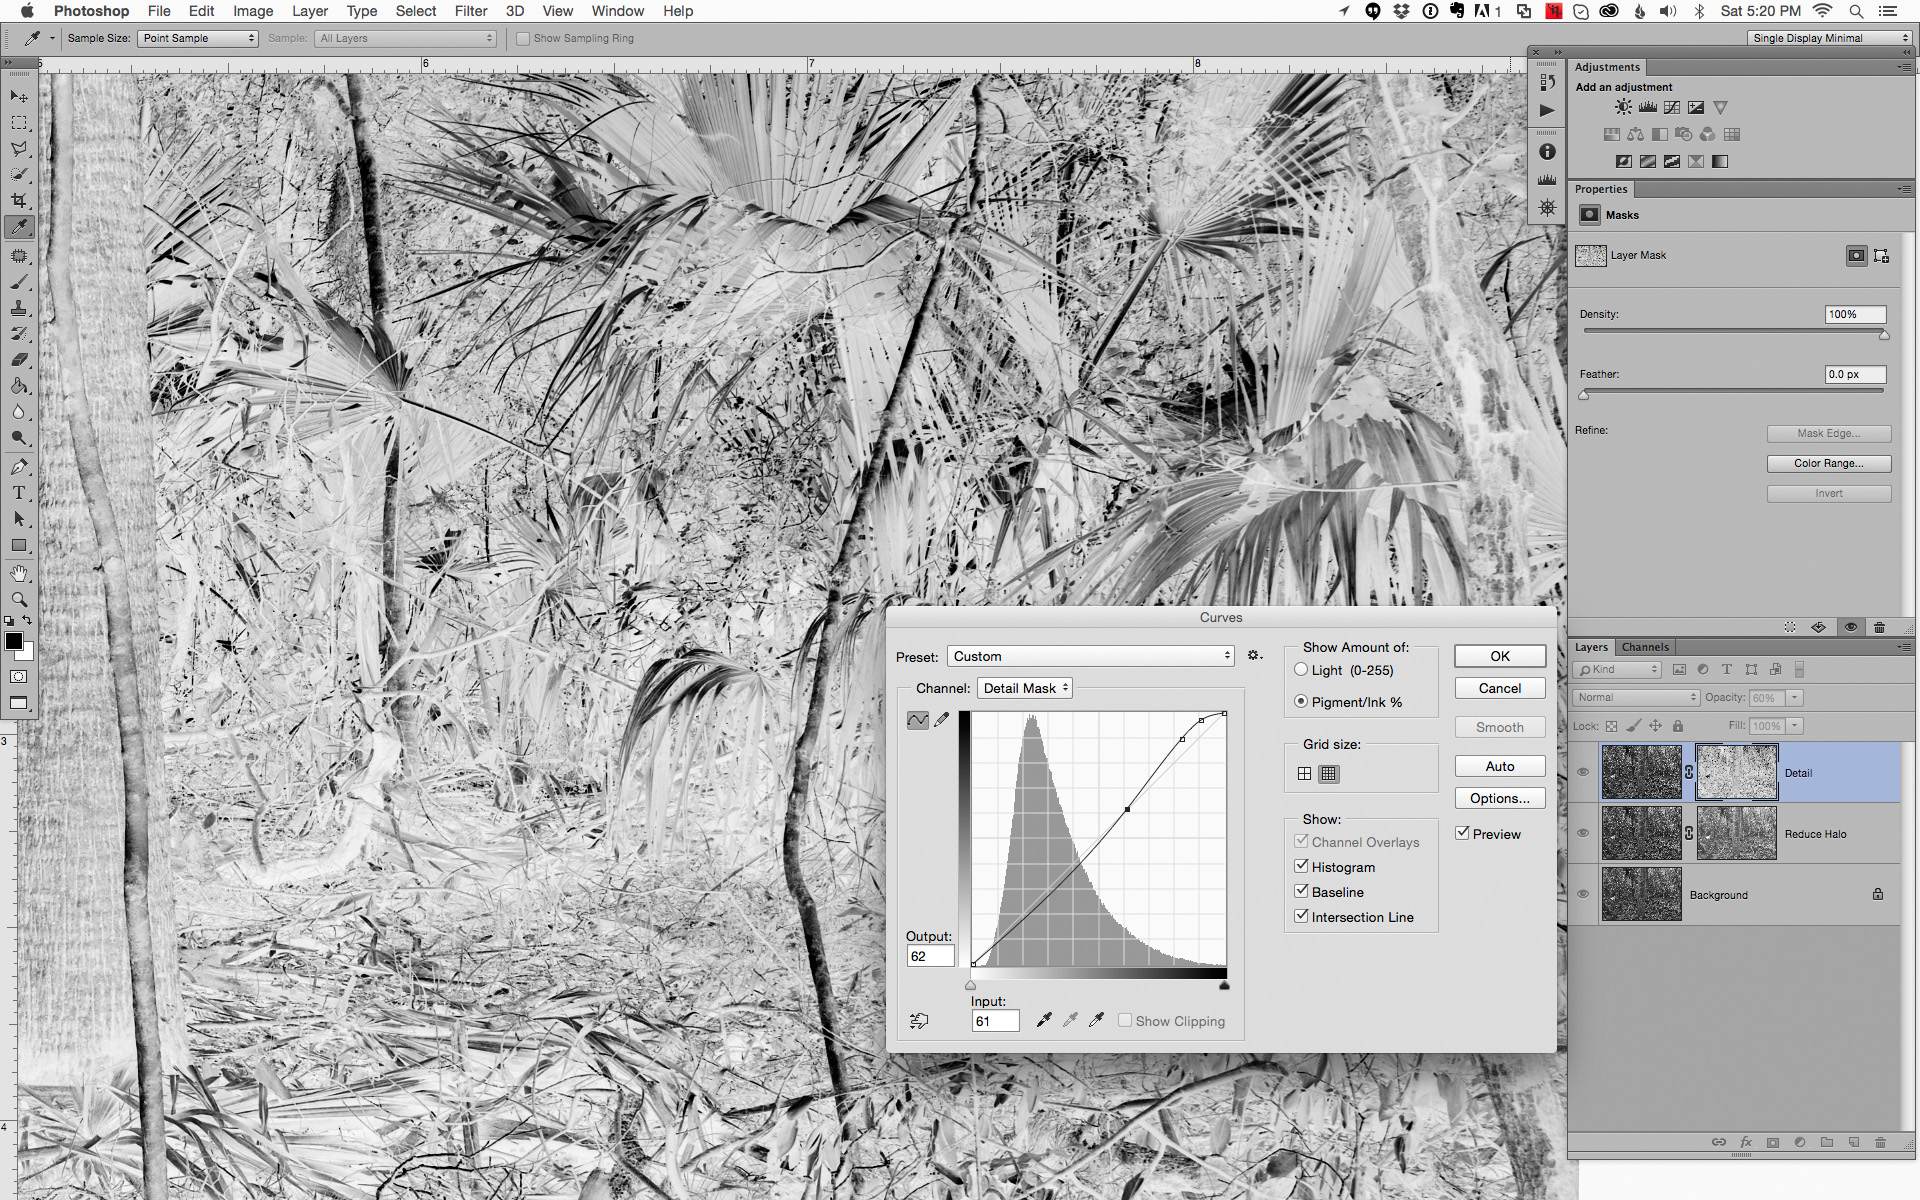
It can also be controlled by applying a curves adjustment to the mask.
To do this, make the mask active and press option/alt while clicking in the mask icon and then hit cmnd/cntrl+m to bring up the curves adjustment and darken the shadow portion of the curve and lighten the highlights. This is like applying an adjustment to an Alpha Channel and it is important to note that once the curve is applied, it is a destructive edit to the mask and cannot be reversed or undone further in the process.
- You can lower the density and readjust the feathering of the mask in the Masks Panel.
Now go back to the layer opacity and change it to a value between 50%-70%, which should be sufficient in boosting the mid-tone separation and fine detail, without overdoing the effect.
- You can now select both of these detail enhancement layers and create a new layer group to keep the Layers Panel more organized and less cluttered. The added benefit of grouping the detail enhancement layers is that they can be further controlled through the group opacity setting.


With these adjustments made, you can proceed with any burning and dodging adjustments, with curves adjustment layers placed above the detail enhancement layers. With the added detail and separation created in these previous steps, additional contrast (if desired) will require less dramatic curves adjustments.

Specially priced example print made with the techniques detailed in specific blog posts
Available in two editions
— 5.5"x9" signed and un-numbered print on 8.5"x11" paper
—12"x20" limited to an edition of 15 signed and numbered prints
Printed on Museo Portfolio Rag with a custom six gray ink blend of Jon Cone Piezography Carbon inks and STS Matte Black for additional density using my unique QuadToneRip profiling process.